01 Apr 1. INSTALLATION
System requirements
Construction Project is Add-In for Microsoft Office Project and works with MS Project installed. Minimal system requirements are:
- Windows OS 7 and above
- MS Office Project Standard 2013 and above
- MS Office Excel 2016 and above
Installation
- Click download and run CPsetup.exe
- Start MS Project after successful installation. Selecting path Dialog box appears.
- Select root path where ‘Construction Project’ folders, files and settings must be. Cloud or shared folder is good choice if you like to share information with team. (it can be changed later in ‘Settings’).
- MS Project starts and ‘Start Page’ appears (check ‘Do not show again’ to hide next time MS Project runs).
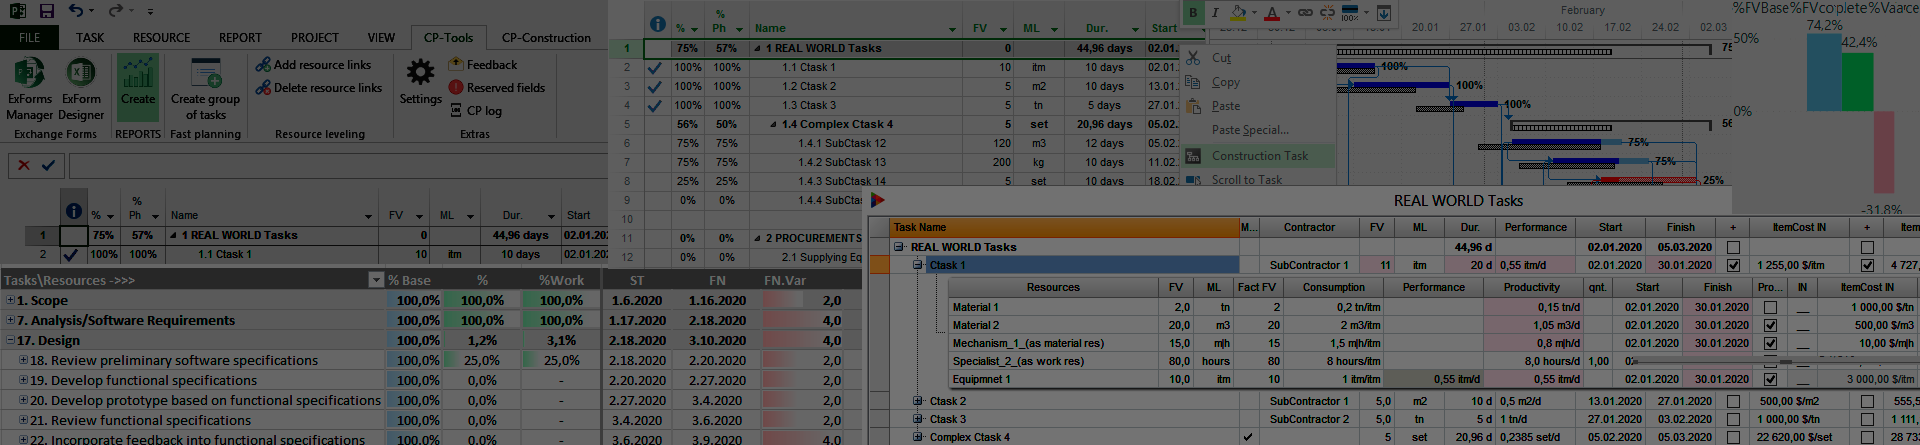
- Double Click ‘Load Demo-project’ to get Reports, ExForms samples installed and demo-project loaded for you. Report and ExForm templates are important to start developing new ones. Demo-project presents Advanced Task features learning sample. It helps you to achieve your goals faster .
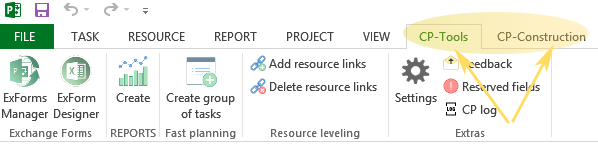
- Finally, CP-Tools and CP-Construction tabs appear on MS Project ribbon. Settings, buttons and menus description is here.
FREE version restrictions
Free (or ‘EDU’) version is installed by default and provides the following functionality:
- Reports and Resource leveling are fully functional for any projects.
- All functions available without any restrictions for projects with no more than 200 tasks.
Free one-month ‘PRO’ (fully functional) version also available by request , see details …
Switch off or uninstall
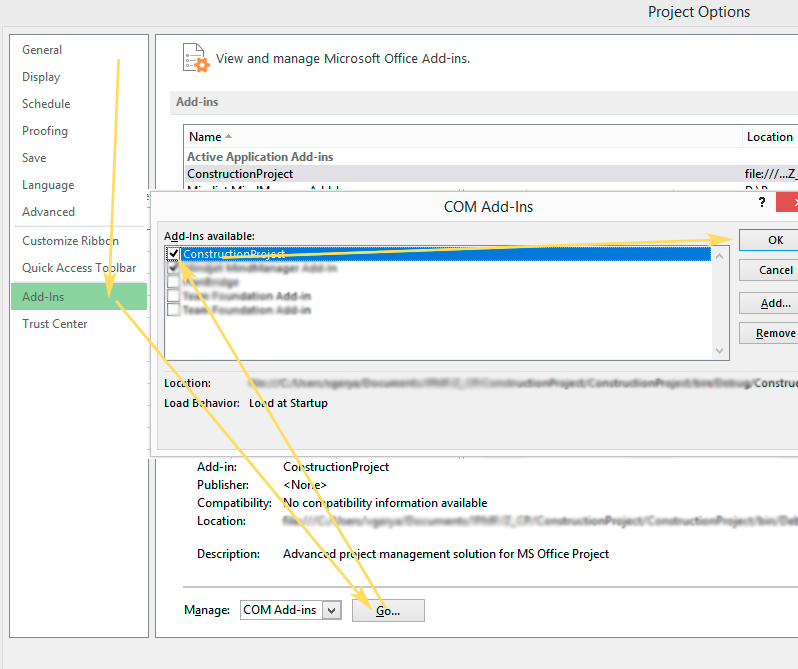
Construction Project is safe. It does not contain advertising or any other annoying functionality, does not collect any personal data and is not sending any spam. You may easy switch off Construction Project in Add-In menu of MS Project (File => Options => Add-Ins) or fully uninstall in Windows ‘Program and components’
No Comments